Windows 10 היא אחת הגרסאות הצפויות ביותר של Windows על ידי מיקרוסופט. למרות ש- Windows 8 יצר טרנד חדש בעולם מערכת ההפעלה של שולחן העבודה, היו לו כמה בעיות בעיצוב וביצועים שהיו המוקד העיקרי עבור מיקרוסופט ב- Windows 10. אז, Windows 10 Final Build נחשף ב- 29 ביולי 2015, עבור Desktop as וכן סמארטפונים.
זה כלל הרבה שינויים על ידי התחשבות בפגמים של Windows 8. למעשה, מדובר בגרסה מתקדמת של Windows אך עדיין, ישנן מספר השלכות המתרחשות מדי יום עם משתמשים שונים.
חלק עיקרי מההשלכות הללו הוא הטעויות שמתגלות כשמנסים לבצע משימה מסוימת. מספר אנשים עברו הודעת שגיאה בזמן שניסו לפתוח תוכנות ודפדפנים שונים בתוך חלונות Windows 10. שגיאה זו כוללת הודעת שגיאה שאומרת שהיישום לא הצליח להתחיל כראוי (0xc0000005). לחץ על אישור כדי לסגור את היישום . שגיאה זו מתרחשת בדרך כלל בדפדפני אינטרנט אך היא אינה מוגבלת לאלה. כל יישום בתוך Windows יכול להפסיק להגיב בגלל שגיאה זו. אז, זה צריך להיות מתוקן כדי להחזיר את התוכנה החיונית לעבודה.

11/12/2016: משתמשים דיווחו כי השיטות המפורטות להלן יעבדו גם ב- Windows 7.
הסיבה מאחורי שגיאת Windows 10 0xc0000005:
ישנן מספר סיבות ידועות שגורמות לשגיאה זו להפריע לפעולות תוכנות שונות ב- Windows 10. אחת הסיבות שנחשבות כגורם מרכזי היא תוכנית אנטי-וירוס של צד שלישי הגורמת להתנגשויות עם קבצי הפעלה ומשפיעה על פעולותיהן. מצד שני, רישומים עלולים להיפגע בגלל תוכנות זדוניות ווירוסים שגורמים לתוכניות להתנהג בצורה לא תקינה. לפעמים מנהלי התקנים גרועים של חומרה יכולים להיות גם האשם שגורם לשגיאה זו.
פתרונות לתיקון שגיאת Windows 10 0xc0000005:
בהתבסס על הסיבות שהוזכרו לעיל, הפתרונות הם פשוטים. לכן, עברו על השיטות הבאות כדי להיפטר מהודעת השגיאה המתסכלת הזו.
תיקון קבצי מערכת פגומים
הורד והפעל את Restoro כדי לסרוק ולשחזר קבצים פגומים וחסרים מכאן , לאחר שתסיים המשך לפתרונות שלהלן. חשוב לוודא שכל קבצי המערכת יהיו שלמים ולא פגומים לפני שתמשיך עם הפתרונות שלהלן.
שיטה מס '1: תיקון תוכנית האנטי-וירוס
תוכניות אנטי-וירוס יכולות להשפיע על קבצי ההפעלה של מספר תוכניות. לכן, על מנת לפתור בעיה זו, אתה נדרש להשבית את תוכנית האנטי-וירוס של צד שלישי כדי לבדוק אם היא הייתה האשמה או לא. שים לב כי השבתת תוכניות אנטי-וירוס עלולה לגרום לאיומים חמורים על המחשב שלך כאשר אתה מחובר לאינטרנט.
אתה יכול גם להסתמך על תוכנת האבטחה של Windows עצמה, כלומר Windows Defender . יש לו את אותה פונקציונליות כמו לכל אנטי-וירוס אחר. באפשרותך להשבית את האנטי-וירוס על ידי ניווט אל הגדרותיו וכיבוי המגן.

לאחר השבתתו, בדוק אם קיימת שגיאה שוב. אם זה עדיין נמשך, עבור לשיטה הבאה.
שיטה מס '2: תיקון רישומים
הרישום הוא מסד הנתונים המרכזי של Windows אשר נמצא בשימוש כל הזמן על ידי המחשב כדי לעזור זה לקרוא קבצים רבים והגדרות שונות כי היא צריכה לרוץ. רישומים עלולים להיפגע עקב נזק לכמה קבצים מסוימים הנדרשים לצורך ערימת הכל במקום. לכן, רוב המומחים ממליצים שתקפיד לגבות את הרישום שלך ולשמור את הגיבוי על מקל USB קונבנציונאלי, כך שתוכל להחיות את הרישום במצב הקודם במקרה של שחיתות. עם זאת, אם לא גיבית את הרישום שלך, בצע את השלבים הבאים כדי לתקן רישומים כדי לפתור את השגיאה 0xc0000005 .
1. הורד תוכנה מנקה הרישום מקישור זה .
2. לאחר הורדתו, התקן אותו באמצעות ההגדרות המומלצות. פתח את התוכנה לאחר סיום תהליך ההתקנה.
3. בממשק, לחץ על כרטיסיית הרישום שנמצאת בחלונית השמאלית ולחץ על הלחצן שכותרתו סרוק לבעיות . זה יתחיל לחפש שגיאות ברישום וכאשר החיפוש יסתיים, יופעל כפתור תקן נושא שנבחר . לחץ על כפתור זה והכל יתוקן.

שיטה מס '3: תיקון מנהלי התקנים פגומים
מנהלי התקנים הם תוכנות המסייעות למחשב לתקשר עם חומרה המחוברת אליו. לכן, כאשר הם ניזוקים, החומרה נוטה לגרום לתקלות . תיקון צוללנים פגומים אלה יכול לעזור לכם במספר דרכים. בצע את השלבים הבאים.
1. פתח את מנהל ההתקנים על ידי לחיצה על Win + X ובחירתו מהרשימה.
2. בתוך מנהל ההתקנים, גלול מטה כדי לראות אם יש חומרה עם סימן צהוב. אם יש, לחץ באמצעות לחצן העכבר הימני שם ובחר עדכן תוכנת מנהל התקן . אם התקנת מנהלי התקנים לאחרונה, התקן מחדש גם מנהלי התקנים אלה.

3. בחלון שמופיע לאחר מכן לחץ על חיפוש אוטומטי אחר תוכנת מנהל התקן מעודכנת בכדי לאפשר לה לחפש ולהתקין מנהלי התקנים באופן אוטומטי. במקרה, אם הורדת את מנהלי ההתקנים באופן ידני, לחץ על האפשרות שלמטה כדי לדפדף ולהתקין אותם. לאחר סיום התהליך, בדוק אם קיימת השגיאה.

שיטה מס '4: תקן BCD
שיטה זו אמורה להתבצע על ידי המשתמשים על אחריותם בלבד. זה אכן עבד עבור חלק ולא עבור חלק. יהיה עליך להפעיל מחדש את Windows לאחר ביצוע השלבים במדריך זה.
- החזק את מקש Windows ו- Press X . בחר שורת פקודה (מנהל מערכת)
- הקלד " bcdedit" ולחץ על ENTER. אם נתיב מטען האתחול של Windows שלך הוא xOsload.exe, עליך להסיר כמה קבצים ולתקן את ה- BCD שלך. אתה יכול לראות זאת בשדה PATH לאחר ביצוע הפקודה "bcdedit".
- לאחר שתסיים, בצע את הפקודות הבאות למטה, חלקן עשויות לחזור שלא נמצאו אך להתעלם מהשגיאות ולהמשיך עד האחרונה. ודא שלחץ על מקש ENTER לאחר כל פקודה.

Del D: \ Windows \ System32 \ xOsload.exe Del D: \ Windows \ System32 \ xNtKrnl.exe Del D: \ Windows \ System32 \ Drivers \ oem-drv64.sys attrib c: \ boot \ bcd -h -r -s ren c: \ boot \ bcd bcd.old bootrec / rebuildbcd
שיטה 5: חיפוש עדכוני Windows
עדכוני Windows מכילים לעתים קרובות תיקונים עבור כמה תקלות ותקלות, אך הם ידועים לשמצה בכך שהם מפנים את מקומם לבעיות חדשות במחשבים של אנשים. עם זאת, בשלב זה אנו נבדוק אם קיימים עדכונים עבור מערכת ההפעלה שלך מכיוון שמיקרוסופט תוקנת לעיתים קרובות את כל הבעיות המגיעות מהעדכונים שלהם. על מנת לעשות זאת, פעל לפי המדריך להלן.
- לחץ על "Windows ' + " I " כדי לפתוח את הגדרות Windows.
- בהגדרות, לחץ על האפשרות "עדכונים ואבטחה" ומצד שמאל בחר באפשרות "Windows Update" .
- במסך הבא, לחץ על האפשרות "בדוק אם קיימים עדכונים" והיא תנחה את Windows באופן אוטומטי לבדוק אם קיימים עדכונים זמינים.

- לאחר סיום בדיקת העדכון, לחץ על כפתור "הורד" כדי להפעיל הורדה והתקנה של עדכונים חדשים במחשב שלך.
- לאחר התקנת עדכונים אלה, בדוק אם פעולה זו תוקנה את הבעיה במחשב שלך.


שיטה 6: שחזור המחשב
אם זה עתה התחלת לקבל את הבעיה, ייתכן שהיא מופעלת עקב התקנת מנהל התקן פגומה או אפילו בגלל יישום נוכל שאולי התקנת במחשב שלך לאחרונה. לכן, בשלב זה, נחזיר את מצב המחשב למועד מוקדם יותר, ואני מקווה שזה אמור לתקן את הבעיה אם זה היה בגלל הסיבות שהוזכרו לעיל. בכדי לעשות את זה:
- לחץ על "Windows" + "R" כדי לפתוח את הפקודת ההפעלה.
- הקלד "rstrui" ולחץ על "Enter" כדי לפתוח את חלון ניהול השחזור.
- לחץ על "הבא" וסמן את האפשרות "הצג נקודות שחזור נוספות" .
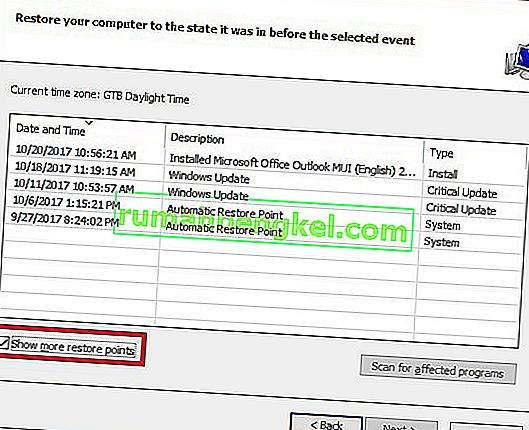
- בחר נקודת שחזור מהרשימה שנמצאת לפני התאריך בו התחילה בעיה זו.
- לחץ שוב על "הבא" ובצע את ההוראות שעל המסך כדי להחזיר הכל לתאריך שנבחר.
- לאחר השלמת השחזור, בדוק אם הבעיה עדיין נמשכת.


שיטה 7: הפעל חומת אש
יתכן שבמקרים מסוימים השגיאה מופעלת מכיוון שהיישום חשוד או לפחות אם סומן כחשוד וחומת האש של Windows אינה פועלת במחשב שלך כדי לאמת חשוד זה. לכן, בשלב זה, אנו נוודא כי חומת האש של Windows מופעלת על מנת להיפטר משגיאה זו. בשביל זה:
- לחץ על "Windows" + "R" כדי לפתוח את הפקודת ההפעלה.
- הקלד "לוח בקרה" ולחץ על "Enter" כדי להפעיל את ממשק לוח הבקרה הקלאסי.
- בלוח הבקרה, לחץ על האפשרות "הצג לפי:" ובחר בלחצן "סמלים גדולים" .
- לאחר ביצוע בחירה זו, לחץ על האפשרות "חומת האש של Windows Defender" כדי להפעיל את חומת האש ואז בחר באפשרות "הפעל או כבה את חומת האש של Windows Defender".
- הקפד לבדוק את "הפעל את חומת האש של Windows Defender" עבור שתי האפשרויות הזמינות להפעלת חומת האש.
- לאחר ביצוע הבחירה הזו, שמרו את השינויים וסגרו מחוץ לחלון.
- לאחר שתעשה זאת, בדוק אם הבעיה עדיין נמשכת.


שיטה 8: הפעל סריקת SFC
In some situations, you might’ve installed a bad driver on your computer or at some point, due to a storage failure, some system files or drivers might’ve been corrupted. Therefore, in this step, we will be running a complete system scan to identify any drivers that are missing signatures or to fix any abnormalities in the system files. For that:
- Press “Windows’ + “R’ to open the Run prompt.
- Type in “cmd” and then press “Shift’ + “Ctrl” + “Enter” to provide admin permissions.Running the Command Prompt
- Type in the following command inside the command prompt and press “Enter” to execute it.
sfc /scannow
- Let the computer scan for any broken or corrupted items and it should automatically replace them with working ones.
- Check to see if doing so fixes the error message.

Method 9: Disabling Data Execution Prevention
Data Execution Prevention is a program that prevents certain programs or executables from being able to run on your computer because it suspects that they might be viruses. Due to this prevention, sometimes, as a false alarm, legit applications might also face issues while trying to run on your computer. Therefore, in this step, we will be disabling this setting from the system configuration panel. For that:
- Press ‘Windows’ + “R’ to open the Run prompt.
- Type in “Control Panel” and press “Enter” to launch the classical control panel interface.

- Inside the Control Panel, click on the “View By:” icon and then select the “Large Icons” option.
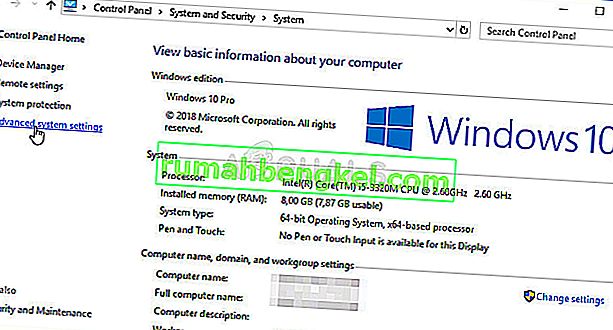
- After selecting Large Icons, select the “System” option.
- Click on the “Advanced System Settings” option on the left side of the screen.
- In the advanced System Settings, click on the “Advanced” tab from the top.
- In the advanced tab, click on the “Settings” option under the “Performance” heading.
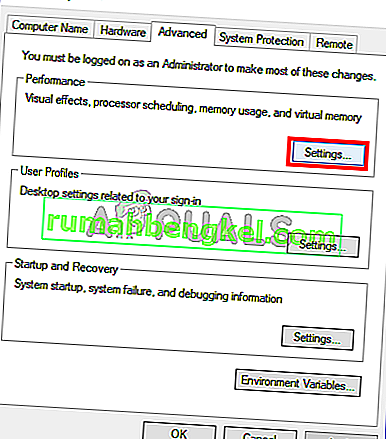
- On the next window that opens up, click on the “Data Execution Prevention” tab, and then select the “Turnon DEP for all programs except thoseI Select” option.
- After that, click on the “Add” option and point to the executable of the application that you are facing issues with.
- This way, that application will no longer come under the jurisdiction of the DEP program.
- Check to see if doing so has fixed the issue.


If the above process is unable to fix the issue, it might be because the executable isn’t the only one being affected by the DEP program. Sometimes the DEP might actually be preventing a herd of executables from being run on the computer and to counter this we will be disabling DEP completely.
Disabling DEP completely cannot be done through any Windows setting and it needs to be done manually through the command prompt. Remember to take this step as a last resort because this can in some cases makes your computer more vulnerable to viruses and malware attacks. In order to disable DEP through the command prompt:
- Press “Windows” + “R’ to open the Run prompt.
- Inside the Run prompt, type in “cmd” and then press “Shift” + “Ctrl” + “Enter” to launch in admin mode.
- Inside the command prompt, type in the following command and press “Enter” to execute it on your computer.
bcdedit.exe /set {current} nx AlwaysOff - Once the command has been executed, run the application that you want to and check to see if the error message still persists.
Method 10: Disable Firewall and Windows Defender
In some situations, the executable that you want to run on the computer might actually be blocked by the Firewall and it would not be able to make contact with its servers this way. Therefore, we will have to allow the executable in our Firewall for both public and private networks which should get it working if the Firewall is preventing it.
In addition to that, sometimes the Windows Defender might prevent the application from running on your computer because its local files might be suspicious and not properly signed. This can be due to a false alarm as well so we will be disabling the Windows Defender for the application as well by adding an exclusion. In order to do that:
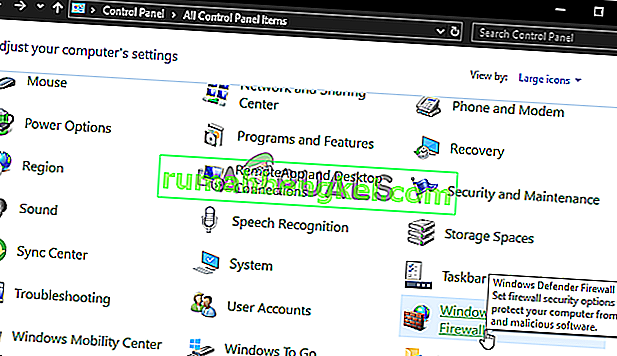
- Press “Windows” + “R” to launch the Run prompt.
- Type in “ControlPanel” and press “Enter” to launch the classical control panel interface.
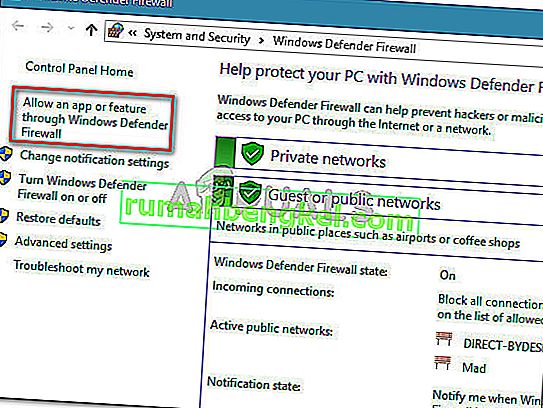
- Click on the “View by:” button, select “Large Icons” and then click on the Windows Defender Firewall option.
- Select the “Allow an app orfeature through the Firewall” button on the left pane and then click on the “Change Settings” button and accept the prompt.
- From here, make sure that you check both the “Public” and the “Private” options for the application and its entries.
- Save your changes and exit out of the window.
- After that, press “Windows” + “I” to launch the settings and click on the “Updateand Security” option.

- From the left pane, click on the “Windows Security” button and then click on the “Virus and Threat Protection” button.
- Select the “Manage Settings” button under the Virus and Threat Protection Settings heading.
- Scroll down and click on the “Add or Remove Exclusions” button in the next window.
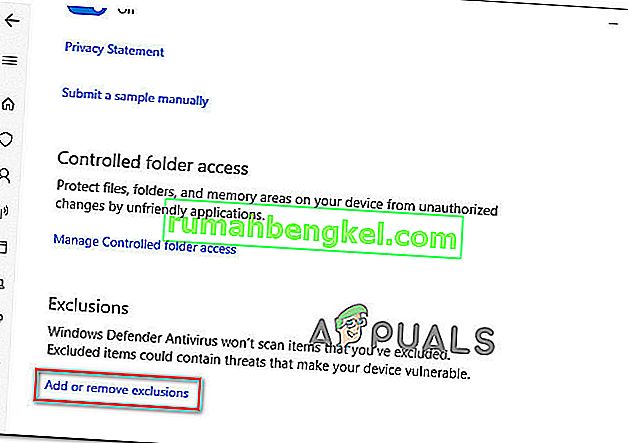
- Click on the “Add an Exclusion” option and select “Folder’ from the File type.
- Make sure to specify the application’s folder with which the issue is occurring and exit out of this window after saving your changes
- Check and see if doing so has fixed the error message.


Method 11: Reinstall Firefox
If you are getting this error while trying to launch Firefox, it might be occurring because the applications haven’t been installed properly on your computer. Therefore, in this step, we will be launching the app management window and uninstalling Firefox after which we will reinstall it completely by downloading it from the Firefox website. For that:
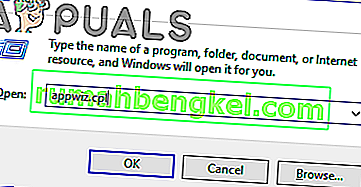
- Press “Windows” + “R” to open the Run prompt.
- Type in “appwiz.cpl” and press “Enter” to open the app management window.
- In the app management window, scroll down and right-click on the “Firefox” application.
- Select “Uninstall” from the list and then follow the on-screen instructions to remove the software from your computer.
- Repeat this step for all instances and bundled applications of the software installed on your computer.
- Make sure to disable any third-party antiviruses at this point to make sure that the software is installed smoothly.
- Head on over to the Mozilla website and click on the download button.

- Click on the downloaded executable and install it on your computer following the on-screen instructions.
- Check to see if doing so has fixed the error message on your computer.


Method 12: Scanning for Malware
It is possible in some cases that the computer has acquired malware that is preventing the user from being able to run all the system functions on their computer. Therefore, in this step, we will be using the default Windows Defender to scan our computer thoroughly for any viruses or malware that might’ve found its way on our computer. For that:
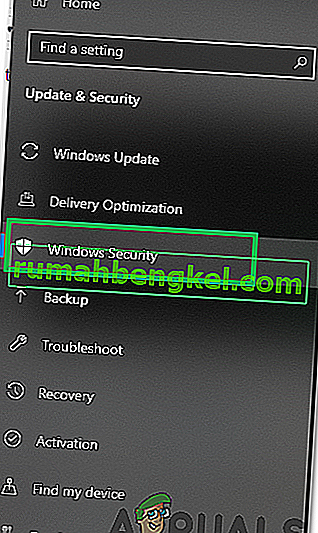
- Press the “Windows” + “I” keys simultaneously on your PC to open the Settings tab.
- Navigate to the Update& Security option and then click on the “Windows Security” button on the left tab.
- After that, click on the “Open Windows Security” and select the “Virus and Threat Protection” option.
- After that, click on the “Scan Options” button below the “Quick Scan” window.
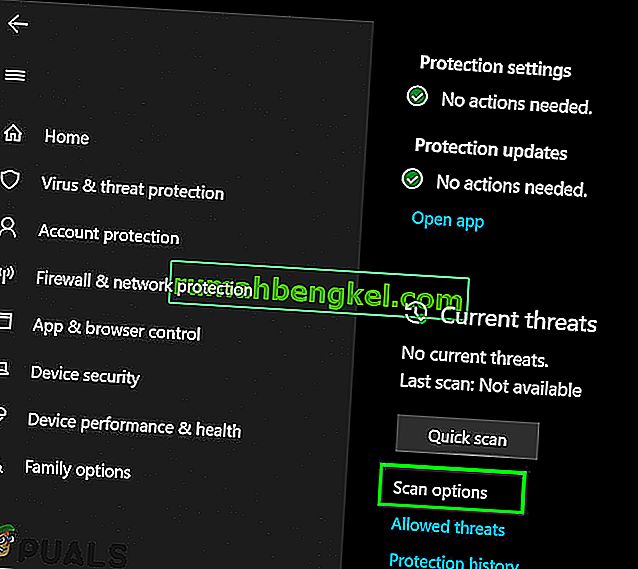
- Click on the “Full Scan” option and then hit the button of “Scan Now”.
- Wait for a few seconds while this process gets completed and then finally check if the error gets resolved now.


Microsoft Security Scanner is an additional tool that you can use to test the system for any further viruses and malware because sometimes the default tool isn’t able to perform the scan properly. Therefore, in this step, if the issue still hasn’t been resolved, we will be using the Microsoft Security Scanner to further make sure for any issues.
- Launch your browser and download the Microsoft Security Scanner from here.
- After downloading the executable, run it on your computer and let it install.
- Accept the License Agreement terms and click on “Next”.

- Select “Full Scan” and click on “Next”.
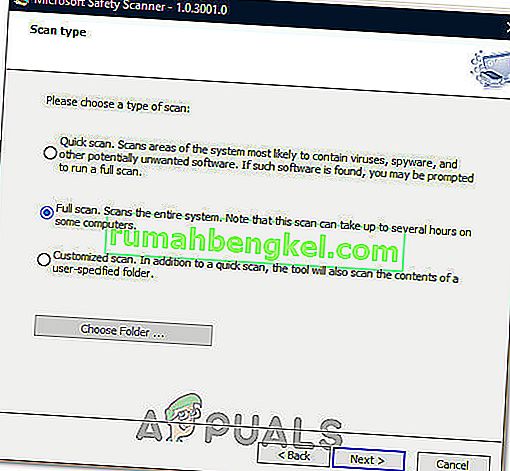
- After you opt for a full scan, the software will start scanning your entire computer to look for any malware or viruses that might’ve disguised themselves as normal executables or applications.
- After this scan has been finished, check to see if the error message still persists.


Method 13: Install Missing Drivers
It is possible in some situations that your device is missing certain drivers due to which this particular issue is being triggered on your computer. Therefore, we will be checking for any missing drivers and then we will check to see if the error is fixed. In order to do this, follow the guide below.
- Download Driver Easy on your computer.

- Run the downloaded executable and install the software on your computer.
- Run the check and see if there are any missing drivers on your computer.
- Install these missing drivers and then install them either manually or automatically using the Software.
- After installing all the missing drivers, check to see if the issue still persists.

Method 14: Reconfigure Registry
It is possible that in some cases, you haven’t properly configured all the registry settings or that you unknowingly configured something incorrectly. Therefore, in this step, we will be reconfiguring our Registry to fix a certain key that sometimes, if misconfigured, causes this particular error on Windows. In order to do this, follow the guide below.
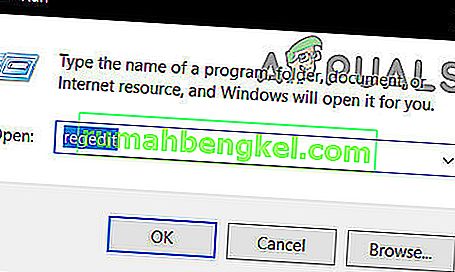
- Press “Windows” + “R” to open the Run prompt.
- Type in “regedit” and press “enter” to launch the registry editor.
- Inside the registry editor, navigate to the following location.
HKLM\SOFTWARE\Microsoft\Windows NT\CurrentVersion\Windows\AppInit_Dlls
- Double click on the “LoadAppInit_DLLs” entry on the right side of the screen.
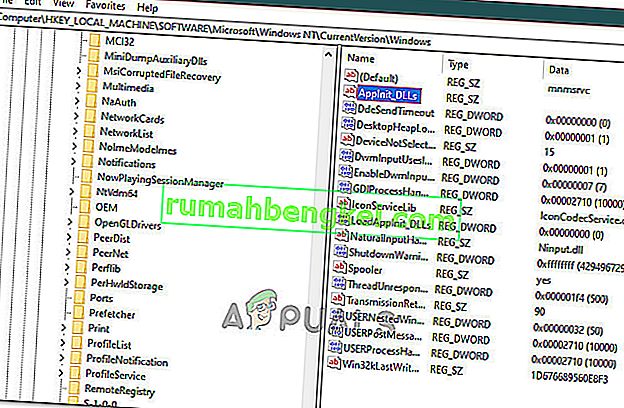
- Change the value of this registry from “1” to “0”.
- Save your changes and exit the registry editor.
- Check to see if doing so has fixed the error.


Method 15: Update Disk Drivers
In some cases, the Disk Drivers that are being used to control your Storage and other Disks installed on the computer might have been outdated due to which the error is being triggered. Therefore, in this step, we will first be opening the Device Management Window and from there, we will be updating these drivers. In order to do so, follow the steps mentioned below.
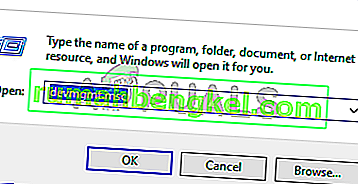
- Press “Windows’ + “R” to open the Run prompt.
- Type in “Devmgmt.msc” and press “Enter” to launch the device management window.
- In the Device Manager, double click on the “DiskDrives” option to expand it.
- Right-click on the storage device listed and select the “Update Driver” option.
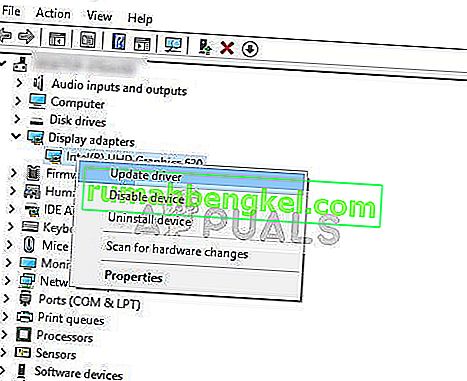
- Select the “Search Automatically for Drivers” option and let the setup search.
- If there are any drivers available, Windows will automatically check for them and install them on your computer.
- Check to see if doing so has fixed the issue.


Method 16: Disabling Automatic Updates and Uninstalling Updates
It is possible in some cases, that this error is stemming from a faulty update install. Microsoft is notorious for pushing out updates that aren’t properly customized to work for all hardware combinations and often go on to break things instead of making them better. Therefore we will make sure that the recent update isn’t installed on our computer.
In order to do this, we will have to first disable automatic updates on our computer and then we will be uninstalling the recently installed updates. Make sure to back up any important data that you don’t want to lose just in case this goes bad.
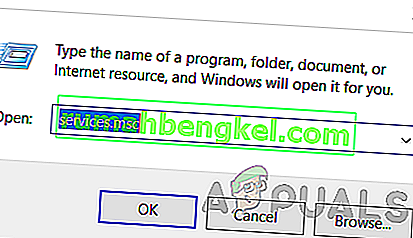
- Press “Windows” + “R’ to open the Run prompt.
- Type in “service.msc” and press “Enter”.
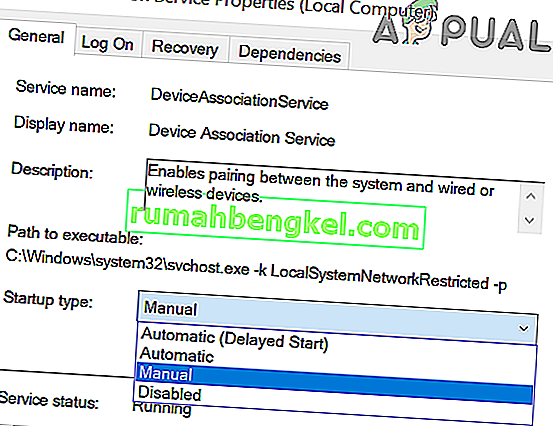
- Scroll through the list and double click on the “Windows Update” service.
- Click on the “Stop” button and then click on the “Startup Type” dropdown.
- Select “Disabled” from the list and select the “Apply” button from the window.
- Click on “OK” to close out of this window.
- Check to see if doing so has stopped your computer from updating.


After stopping the computer from updating, we will now be uninstalling the recent updates that have been installed on your computer. For that:
- Press “Windows” + “I” buttons to open the settings.
- In settings, click on the “Update and Security” option and then select the “Windows Update” button from the left pane.

- In the Windows Update, click on the “View Update History” option.
- In the Update History, click on the “Uninstall Updates” option and it should take you to the uninstallation screen where all the recently installed updates will be listed.
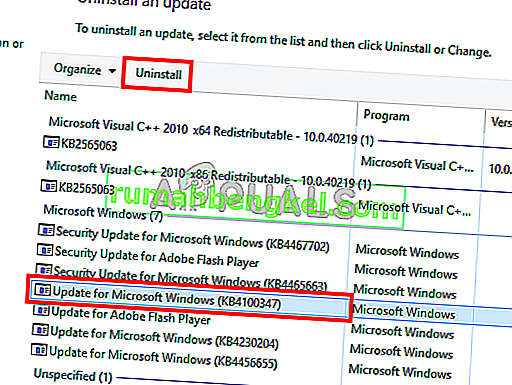
- From the list, right-click on the update that was installed recently and caused this error on your computer.
- Right-click on this update and select the “Uninstall” button to remove it completely from the computer.
- Follow through with the on-screen instructions.
- Check to see if uninstalling has fixed this issue.


Additional Fixes:
- In addition to some of the recommendations given above, you should try to check if there are any bad memory modules (RAM) installed on your computer which can be a cause of this.
- כמו כן, דאג לבדוק אם לא שעברת את ה- RAM שלך לרמה מעבר למגבלה המומלצת. אם עשית זאת, נסה להחזיר אותו לברירות מחדל במפעל ולבדוק אם זה פותר את הבעיה שלך.